Table of Contents [show]
VAMO v3 – A Review
The VAMO, a much-loved APV from Fasttech has legions of fans all over the Vaping Universe. With good reason I might add. It is dependable, versatile, and cheap. Well, not cheap, let’s just say inexpensive. There’s just something inherently ‘good’ about a VAMO, and with the VAMO 3 Fasttech has made some great improvements, and a couple of missteps too. Consensus has it that it is also ugly as all get out. I personally don’t think it’s ugly, I think it’s unique looking…different…certainly not just a face a mother could love.
Because of all the hoopla surrounding the 2nd annual July is eJuice Month we’ve neglected some long overdue hardware reviews, and the VAMO 3 is one of them.
I’ve been using my new VAMO 3 for just about 3 weeks now, and I’ve been enjoying it immensely. Rather than wait until August to publish a review I decided to give it a slot in July so we could inform our readers that if they’ve been holding off on upgrading their VAMO 2 or some other mod, you don’t have to. The VAMO 3 is one heck of an APV and if you don’t mind the curvy lines (rifling) on the body, and there is no reason you should, there’s no reason not to love one, buy one, use one. Where else can you get so much for so little?
Before discussing my own real world usage I thought I’d go over the full feature list of the $56 mod.
VAMO 3 Feature List:
- Variable voltage: Adjust the voltage output from 3.0 to 6.0 volts in 0.1-volt increments.
- Variable wattage: Set the preferred wattage (from 3 to 15 watts) and the VAMO V3 will adjust the voltage automatically no matter what atomizer you use.
- RMS Out: RMS provides a more accurate voltage output.
- 510 Threaded: Compatible with 510 atomizers, cartomizers, Vision Ego Clearomizer 2.0, eGo CE4 PLUS V2, Vision Vivi Nova Tanks, SMOKTech DCTank and Kanger Clearomizer
- Can be used with single 18650, single 18350 or two 18350 (flat top)
- Atomizer resistance check
- Battery power check
Dimensions:
- 18650 mode: 5-1/2”L x 7/8”D
- 18350 mode: 4-1/4”L x 7/8”D
- Cutoff Timer: When you press the power button to use the device for 10-15 seconds or more, the device will turn off automatically.
- When a single batteries voltage is less than 3.2v or dual 18350 batteries voltage is less than 6.4v, the screen will display LO v, which indicates that the batteries need to be recharged.
- Atomizers at 1.2ohm or less, the screen will display LO Ω, which indicates that you need to use a new atomizer at higher resistance.
- Atomizer short circuit the screen will display LO v.
- Incorrect battery installation protection. The device will not work circuits will be protected.
- Max current 5A
- Minimum resistance 1.2 Ω
- Thermal Monitoring
- Correct Polarity Signaling
- Heavy Duty Micro-switches
- Vent Hole in Battery End Cap
- Battery End Cap ‘fail safe’ designed to ‘give way’
Real World Usage
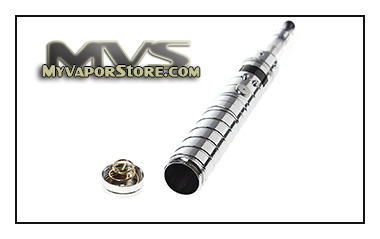
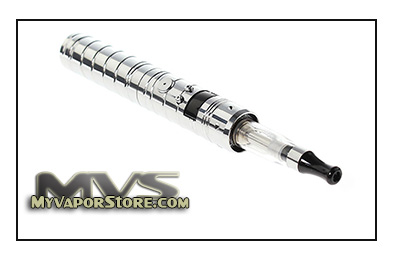
 The VAMO 3 is NOT ugly. I know a lot of people have looked at various photos or have seen a friend’s, and they see the rifling pattern (curvy lines) on it and they think it’s just wrong.
I have the chrome version, and the rifling did take me by surprise but within an hour or so I didn’t even notice it. I think those grooves actually help with the grip. My VAMO 2 is a slippery SOB, and because of that I dropped it before it was a month old and shattered the LED protective cover. I could still make out the readings and such so it didn’t affect the operation, though it did make me feel terrible for a while. The VAMO 3 just feels like it isn’t going to slip out of my hands so easily and I thank that rifling lines for it.
I have plenty of experience with other mods to compare the VAMO 3 to, so spec for spec, feature for feature, the VAMO 3 is almost half the cost of similarly spec’d out mods and every bit as good.
Activator Button
The activator button in the V3 has a better, firmer, more positive action than the V2. (And no, I hear no clicking of metal against metal in mine) The position of the activator button fits my vaping style very well. I’ve found it easy to use with either my thumb or my forefinger. The dual-function buttons stick out just enough and are easy to access and adjust. The three buttons are solid and I believe they will hold up quite well over time. It feels like it’s worth more than it costs, and with the new OLED readout, the new features, and shiny chrome, and all the other little tweaks, I think it’s going to sell extremely well.
Telescoping APV
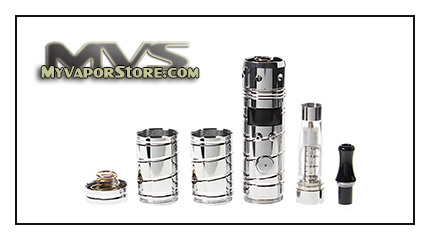
The VAMO 3 is a telescoping device. The body has two sections, allowing you to use different sized batteries depending on your wants or needs at the time. You just remove one section if you want to use an 18350 battery, or leave it on if you want to use an 18650 battery. The batteries also fit nicely so you won’t hear any rattling going on, and the flat top adds to the overall sleek and solid looking unit.
OLED
The OLED display is very to read. The new, bright font seems as though its lifted from the back of the display, with an almost 3D look. I loved my V2 but let’s face it, it wasn’t the easiest device in the world to read the settings. This OLED is a huge improvement over the VAMO 2.
 When starting it up and shutting it down you get a similar scrolling “system: on/off” like you do with the Anytime CVI mod, and it looks better somehow in the VAMO 3 then it does in Anytime CVI (which I don’t even use anymore). That could very well be my own bias at work because I’m a big fan of the VAMO, but it is what is.
Adjustments/Settings
Operating the settings is pretty simple, especially if this isn’t your first APV and you have some idea of what the settings mean. Here’s how simple it is to adjust your setting…
Hold the left button and you get the battery voltage.
Hold the right button down for resistance reading.
Hold both buttons down and you can adjust:
1) Variable voltage or wattage
2) Show battery life, voltage/watts, or resistance when firing
3) Turn the display off and on.
510 Compatible
You can use just about any accessory you want with the VAMO’s; and this has always been the case. Whether you want to use an EVOD, a ProTank, a plain old cartomizer, any 510 carto-tank, or any 510/eGo clearomizer, the VAMO will take pretty much anything with ease.
However, because of the ‘beauty ring’ around the 510 connector, make sure when you’re unscrewing a clearomizer you aren’t leaving the base behind. I know many users like to really tighten down their tank or clearomizer, or whatever they use, but you really don’t need to do that and you can save yourself some ‘distress’ if you screw them down enough to make a nice solid connection to the base to get a good connection. It seems that no matter what I’ve used in the past though, at one time or another I have over tightened and wound up losing a couple of ML of eJuice that dripped down the device and caused quite the mess. Live and learn…now I tighten just enough to get the good connection and I’ve also gotten into the habit of unscrewing from the bottom anyway.
Shut Off Time
The 10-second shut off time feels just right for my vaping style. I average about a 5-second drag anyway so I never hit that shut off mark but some people like to take really long drags from their chosen device and a couple of extra seconds can make the difference between a good amount of vapor and a great amount of vapor. I think I vape like I smoked, so a 10 second drag on any APV would probably wipe me out.
 Only Time Will Tell
Other than the broken crystal covering the LCD display on my VAMO Rev 2 it works perfectly. In the 3 weeks that I’ve been vaping with the VAMO 3 I’ve had zero issues with it, and I managed to drop it a couple of times without breaking the crystal (or plastic or glass or whatever it is). That’s not to say that it won’t break someday, or that the electronics won’t crap out on me in a few months. But, considering this is an upgrade to the VAMO 2, and the VAMO 2 that I own now is still working just fine, I think its fair to say that this $50 mod will last quite a while. If it doesn’t I’ll report back and let you know.
I sometimes wish we could take a few months to use a new device before we have to render a verdict on it, but that’s not practical for anyone. In this case I’m thinking that 3 weeks is pretty decent amount of time to use it and then write a review. Sometimes I have to do it within a week’s time, and I hate sticking my neck out after just a week of usage. This time though, I think I’ve lived with it long enough to know what to expect down the road.
Buying Advice
If you’ve had your sights on a VAMO there is nothing preventing you from diving in and picking up a VAMO 3 now. The refinements are more than enough to upgrade from a VAMO 2, and the price isn’t going to break the bank. Unless the rifling around the unit really bothers you I’d jump on it and pick one up. You could spend a lot more money on other mods and get just about the same feature set, so why waste the money unless you have your heart set on an eVic or ProVari or maybe something from Vape Revolution (oh man, have you seen some of their products? My god, what I wouldn’t do to get one of their high-end ‘mech’ mods!). There is a reason that there are VAMO forums, and VAMO fans… it’s a great mod at a great price, with a feature set of the $100-and-up group.
Tom McBride VAMO Owner since early 2012I would like to thank MyVaporStore for donating this VAMO 3 for this review. MyVaporStore is the official hardware supplier for Spinfuel eMagazine because they stock the stuff we use, at a great price. And since they’ve moved into their larger facility they seem to have everything in stock all the time. If you decide to grab yourself a VAMO 3 you won’t find a better vendor to get it from then MyVaporStore.


