Table of Contents [show]
SMOK TFV12 Cloud Beast King Tank
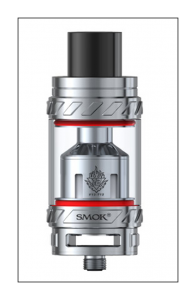
Before getting into the details of the new SMOK TFV12 Cloud Beast King, ($44.95 Element Vape) here are a few important things you need to know before buying this incredible new sub-ohm tank.
This review for the SMOK TFV12 Cloud Beast King does not cover the RBA Edition, which we will cover in a future review.
The standard Sub-Ohm edition comes with a total a three coil heads; 1x 0.12Ω V12-T12 Duodenary Coil, 1x 0.15Ω V12-X4 Quadruple Coil, and 1x 0.15Ω V12-Q4 Quadruple Coil. I’ll go over the coil differences later, but for now you should know that two of us used the V12-T12 coil, that coil is preinstalled in the tank, and two of us switched that coil out for the V12-Q4, the coil head SMOK believes delivers the best “flavor”.
Despite having the same ejuice capacity (6mL) as the TFV8 Cloud Beast, the TFV12 Cloud Beast King is substantially larger. (Side by side I would guess about 20% bigger than the Cloud Beast.) The Coil Heads are also larger and definitely intimidating.
Our Sub-Ohm Tank Setup Checklist is as follows:
- Reseat the Coil Head. Sometimes the coil head can come loose in shipping, or even during assembly at the factory. It can be fastened to the base too tightly. It is our standard practice to remove the coil head and reseat it for a secure connection and to prevent leaking through the base.
- Apply two or three drops of ejuice directly over the top of the coil head. The V12-T12 needed four or five drops of ejuice.
- Secure the base to the tank. Hand tighten only.
- Close the airflow slots on the base of the tank.
- Pull away the unique Top-Fill Rotary Hinge to reveal the O-Ring with the carved-out fill slot.
- Fill the tank with ejuice and snap the Rotary Fill Cap back into place. You will probably face the same dilemma vapers face with the TFV8 and even the TFV4; snapping the hinge into place will most likely require pushing down and pulling in the cap until the lip of the cap slips under the and into the top cap of the tank. After a few refills this becomes easier, but at first the TFV12 can be harder to snap into place than the TFV8 ever was.
Once the SMOK TFV12 Cloud Beast King has been wiped down (regardless of any ejuice drips)
the break-in period begins. This break-in period is vital to successfully using this high performance sub-ohm tank. Below is our standard break-in procedure. Always begin a break in period with the airflow slots wide open.
- Allow the TFV12 to sit quietly for at least 10-15 minutes. You can attach the tank to the mod you’re going to use, or attach it to an Ohms meter, or just lean it against something that will keep it relatively upright. I know there are plenty who will say this length of time is not needed, but it is. Often, when I am breaking in a new coil, I will let it sit for an hour or more, regardless of the tank. Nothing is more important that the complete saturation of the cotton.
- Choose the mod you’re going to use with the TFV12. You’re going to need at the very minimum a 100+ Variable Wattage mod. Your mod doesn’t need to have TC technology, all the premade coils for this tank use Kanthal A1 and Organic Cotton.
- For myself, I chose the HCigar VTi 250, a mod with the Evolv DNA 250 The HCigar VTi can accommodate tanks as wide as 30mm. Together the HCigar VTi and the TFV12 looked incredible.
- Using any of the three coil heads, begin to break in the coil with a wattage of no higher than 50W. Press the Fire Button for 1-2 seconds and release. Repeat two more times. Then take a brief, 2-3 second Direct Lung hit with the airflow slots wide open. Repeat a couple of times.
- Raise the wattage 10W at a time and take a couple of brief lung hits each time.
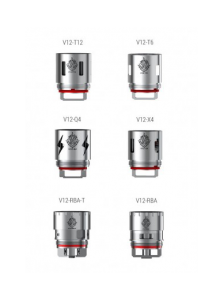
CLICK FOR LARGER IMAGE - The V12-T12 has a wattage range of 60-350W. At 60W you should see a very small amount of vapor with a High or Max VG eliquid. Flavor is almost nonexistent at this level. The V12-Q4 has a wattage range of 60-190W, you can expect a bit more flavor and perhaps a bit more vapor at 60W, but it will beg for more power.
- Since I was one of the two using the V12-T12 I continued to up the wattage until the HCigar VTi 250 hit 110W. I stayed at this wattage level for a while, and my direct lung hits were approximately 4-5 seconds.
- To obtain the longest possible coil life it is vital to not scorch the organic cotton, particularly in the first several hours, so take it slow here, it will pay off days later. For me that meant setting the TFV12 and HCigar VTi 250 aside for the rest of the day. (6 hours)
- Once I was satisfied that the organic cotton was fully broken in and saturated I began my climb up the wattage ladder in search of my optimal wattage
- Despite having a maximum wattage range of 350W, the “recommended” wattage range for the V12-T12 is 130-200W. This recommendation is accurate, and for me, my optimal wattage was 145W.
Using the V12-T12 coil head at 145W gave me smooth, warm vapor and excellent flavor fidelity. On the second day, yesterday, I explored higher wattages and easily reached 200W, the upper range of the recommended wattage. With each 10W increase over the 145W the vapor volume increased to more insane levels, while the flavor stopped improving after 155W. I’m sure this was the ‘fault’ of the eliquid I chose to use; Ethos Crispy Treats, a 70% VG blend.
Vaping in the upper range of the recommended wattage causes the glass tank to become ‘warm’. It had no effect on the Delrin wide-bore drip tip however. The drip tip seemed to stay room temperature throughout the two days of vaping.
Battery Life with the SMOK TFV12 Cloud Beast King
The TFV12 Cloud Beast King is designed for high wattage vaping, which means that if you want any kind of decent battery life your best bet would be to use a mod that takes 3x or 4x 18650 batteries to operate. I would avoid any Evolv DNA 250 device that uses LiPo batteries if you plan to use this tank, I doubt you would get more than an hour of vaping from a full charge.
The HCigar VTi 250, with the Evolv DNA 250 chipset, uses 3x 18650 high-amp cells. When I first attached the SMOK TFV12 Cloud Beast King the cells were fully charged, and only two weeks old. Here’s the breakdown on the initial battery life.
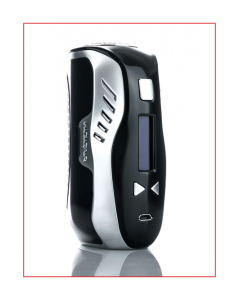
From the start of the break in period to reaching the optimal wattage of 145W I used roughly 25% of the battery life. Exploring the upper wattage range for 20-30 minutes, to going back to 145W and regular vaping I used another 25% in the first hour. (30 minutes exploring and 30 minutes of smooth vaping) At this point, with half the battery life spent, I switched to another mod and tank that I am currently reviewing and didn’t pick up the HCigar VTi and TFV12 until later that night. When I got back to it I spent 90 minutes vaping. At that point the battery indicators on the HCigar VTi told me I had no more than 10% of battery life left, so I switched out the three cells. During this time, I had vaped through only 5mL of ejuice, which surprised me, I expected to go through more than a tankful with a fully charged set of batteries.
The next day I spent a full 8 hours with the HCigar VTi and the TFV12. Now, with a fully broken coil and a steady 135W (10W less than the first day) I averaged a good three hours of battery life before needing to swap out, and the amount of eliquid in the tank seemed to match half the battery life; a fully charged set of three 18650 cells lasted as long as it took me to vape two tanks, or 12mL of juice. That’s better than I expected as well.
More importantly, on the second day the vape of the TFV12 Cloud Beast King was exceptionally smooth. The rick, dense, flavorful vapor was extraordinary.
Flavor and Vapor with the SMOK TFV12 Cloud Beast King
Flavor fidelity with the TFV12 is every bit as good as it is with the TFV8. SMOK has not made any major breakthroughs in the flavor production, nor did they need to. Flavor production is always excellent with SMOK tanks, so for me the SMOK TFV12 Cloud Beast King was all about the vapor production. Note* Julia and Tom report that the V12-Q4 flavor fidelity is also identical to the V8-Q4 coils.
Insane Cloud Production
The success of the TFV12 Cloud Beast King lies within the new TFV12 coil structure. The V12-T12’s Duodenary Coils features twelve-cylinder design in a vertical orientation. These coils are structured for maximum saturation of ejuice, and the carefully wrapped coils evenly distribute the heat for the optimal production of insane amount of vapor. This is the Cloud-Chasers dream come true in a sub-ohm tank world.
Bottom Line
I have no doubt that fans of the previous SMOK TFV8 Cloud Beast will want to at least buy one of the larger TFV12 Cloud Beast King. The tank is destined to be a success, probably the most successful SMOK Sub-Ohm tank ever. That said, potential owners of this astounding new tank will want to be aware that it will require extensive battery usage, and from what I can tell, eliquid consumption over the TFV8 Cloud Beast will be about 10% more. All in all, that’s something I can live with.
Over the past several months I went from using the TFV8 Cloud Beast as my everyday all day tank to the Baby Beast, and then the SMOK Big Baby, which seemed to combine the best of both earlier TFV8’s, utilizing the Baby Beast coils, but adding more juice capacity for less refilling. Now I’m sold on the SMOK TFV12 Cloud Beast King as my everyday all day tank. For owners of 3x or 4x box mods the TFV12 is a must-have tank.
Grade: A+
“Not for the faint of heart, the SMOK TFV12 Cloud Beast King is a serious cloud-chasing sub-ohm tank. Make sure the mod you want to use can take advantage of what this tank can do, otherwise, look to picking up a new, more powerful mod. You won’t regret it.”
Check out the TFV12 Replacement Coils here.
SMOK TFV12 Replacement Coils Features:
- Performance Enhanced Coil Structure
V12-T12 Duodenary/Twelve Coil Design
- 0.15ohm rated for 60-350W, recommended 130-200W
V12-T6 Sextuple Coil Design
- 0.16ohm rated for 90-320W, recommended 120-180W
V12-X4 Quadruple Coil Design
- 0.15ohm rated for 60-220W, recommended 100-170W
V12-Q4 Quadruple Coil Design
- 0.15ohm rated for 60-190W, recommended 90-160W
V12 RBA Rebuildable Head
- Two-Post, Dual Terminal Design
- Dual Coil Configurations
V12 RBA-T Rebuildable Head
- Postless, Six Terminals Design
- 0.15ohm Triple Coil Configurations
SMOK TFV12 Cloud Beast King Tank Features:
- 27mm Base Diameter
- 28mm Reservoir Diameter
- 6mL Maximum Juice Capacity
- Superior Stainless Steel Construction
- High-Grade Glass Reinforcement
- High-Temperature Resistant – Explosion Proof
- Signature Top-Fill Rotary Design with Hinge Lock
- Massive Dual Adjustable Airflow Control at Base
- Black Ultra-Wide Drip Tip
- Performance-Grade V12 Coil Structure
- 12ohm V12-T12 Duodenary – rated for 60-350W,recommended 130-200W
- 15ohm V12-X4 Quadruple Coil – rated for 60-220W, recommended 100-170W
- 15ohm V12-Q4 Quadruple Coil – rated for 60-190W, recommended 90-160W
- V12-RBA – Two-Post, Dual Coil Deck
- V12-RBA-T – Postless, Triple Coil Deck
- 510 Connection
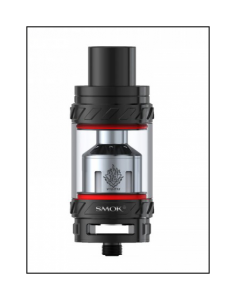
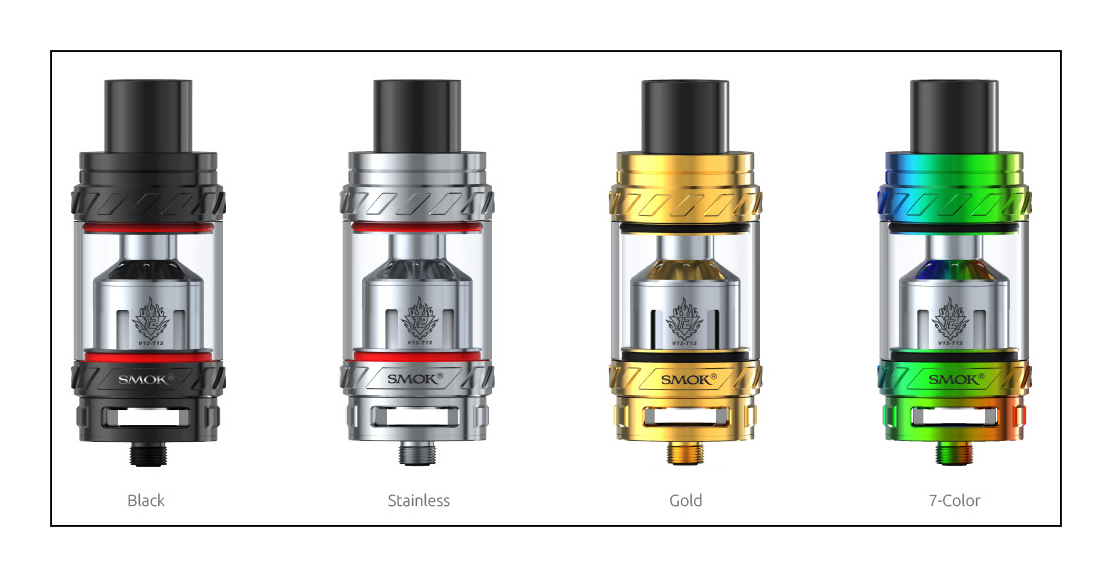
- Available in Stainless, Black, Gold, and Rainbow (7-Color)
SMOK TFV12 Standard Sub-Ohm Edition Includes:
- 1 TFV12 Cloud Beast King
- 1 0.12ohm V12-T12 Duodenary Coil
- 1 0.15ohm V12-X4 Quadruple Coil
- 1 0.15ohm V12-Q4 Quadruple Coil
- 1 Replacement Glass Tube
- Spare Parts & O-Rings
- Instructional Manual
SMOK TFV12 RBA Edition Includes:
- 1 TFV12 Cloud Beast King
- 1 V12-RBA Rebuildable Head
- 1 V12-RBA-T Rebuildable Head
- 1 Replacement Glass Tube
- 1 Single Coil Silicone Adapter
- Spare Parts & O-Rings
- Instructional Manual


