Table of Contents
Review: The Z-Atty Pro for ProVari
I am a sucker for messing around with rebuildable atomizers (RBA). So, when I was asked to review on the Z-ATTY-PRO my fingers started twitching. I am a push over for RBA’s because they give me the control over my vaping experience by allowing me to wrap different resistant coils and choosing the type of wick I want to use. The Z-ATTY-PRO is no different in this aspect.

The Z-ATTY-PRO is exclusive to Provape.com and manufactured by House of Hybrids (houseofhybrids.com) in the United States. There are a few different models of the Z-ATTY RBA’s with the PRO being the version designed to fit the ProVari (provape.com). The other models are the Z-ATTY-G (discontinued) and the Z-ATTY-U. The Z-ATTY-U is the universal model designed to fit any device using a 510 connection. The Z-ATTY-PRO is a genesis style RBA, which means it has a center post and uses a top Coil.
The Z-ATTY-PRO arrives in a plastic tube, which contains all of the required materials to get you started. The items that are included are: an Allen wrench, one syringe with a blunt needle, one spool of kanthal wire, and pre-made stainless steel wicks (Version 2.5 now ships with ceramic wicks). The Z-ATTY-PRO ships without a drip tip, so one will be needed. Any 510-drip tip should do the job. I will give recognition to the manufacturer for shipping the Z-ATTY-PRO fully assembled and ready for use. When I say fully assembled, I mean it has all gaskets in place and has a wick with a coil already in place!
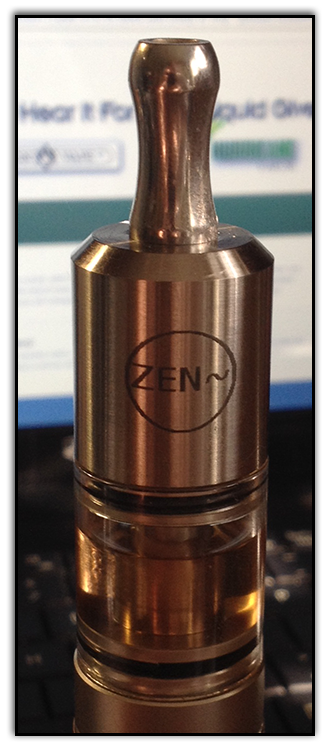
The Z-ATTY-PRO is constructed of 316LVM Surgical Implant Grade stainless steel, with a 4 Ml Fused Quartz tank. In English that means a sturdy, well-built, resistant body and a clear strong tank. One thing different from the Z-ATTY-PRO over other genesis style RBA’s is the way the top cap is held in place over the coil. The top cap is held in place with a gasket, allowing the air hole to be properly positioned.
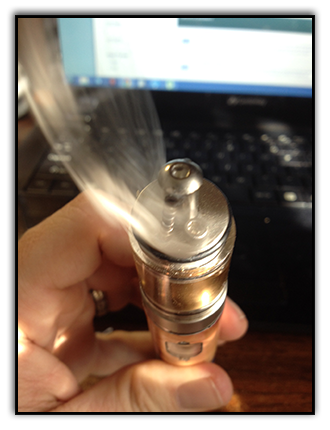
What better way to tell you how it works than to take it out into the real world? With my trusty ProVari in hand I set out on a three-day trial run with the coil and wick already in place. For the three days it was the only device that I vaped with. It became an extension of myself traveling in the car, hanging with me at work, and relaxing at home. Wherever I went the Z-ATTY-PRO was with me. During the three-day trial I have come to love it and to hate it.
Love n Hate
The love I now have for this RBA is from the elegant looks and vapor production of the device. The Z-ATTY-PRO has the show room shine of a new car, with crystal clear glass tank. Each top cap is beautifully etched with the word ZEN and a circle around it. The PRO part signifies that it is designed for use on the ProVari. Instead of having a flat bottom with a 510 connector it has a skirt designed to fit over the ProVari. This skirt gives it a seamless look when sitting on top of the ProVari, thus making it seem as if it is all one unit. The dislike I have for the Z-ATTY-PRO stems from the device style itself.
This RBA must be standing up once it is filled. If it is laid down on its side eLiquid will start to seep out the wick hole. Finding a place to set it down in the car can be a real pain the butt. Surprisingly I found that a cup holder works nicely. Like most Vapers I tend to keep my e-cigarette close to me. This can be a problem. Normally I would just lay it down wherever I am at that time. Unfortunately with a genesis style RBA that is not always an option due to the fact that it will leak if it is laid down. One other thing that I should point out is that while I used the pre-installed wick and coil on my three-day trial, this is not what I would normally do. RBA’s are purchased for the control over the wick and coil.
The pre-installed wick and coil produces a sufficient amount of vapor, but that is not good enough for me. I am a cloud chaser and require a huge plume of vapor to be produced to satisfy my needs. That brings us to the meat and potatoes of this review, the set up.
Setting It Up
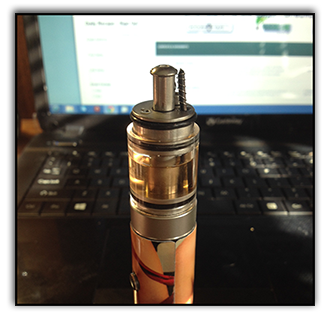
Setting up the Z-ATTY-PRO takes some skill in coil wrapping. The Z-ATTY-PRO that I received included oxidized stainless steel mesh wicks. The first step of assembling the coil is to remove the top cap. Gently, but firmly pull up on the cap as it is held in place by a rubber gasket. If at first it will not move, slightly rock the top cap from side to side. The gasket is dry and will hold onto the top cap for all it is worth. When the top cap starts to move, just pull up on it. Once you have it removed you will notice a tall center post with a screw in the top. This is your positive terminal. You will also notice two holes, one larger than the other. The larger of the two is the wick hole and the smaller one is where you would use the blunt tip syringe to fill the tank with your choice of eLiquid. Next to the wick hole you will see a screw… this is the negative terminal.
This is the part where you will need some coil wrapping skills. I like to wrap my coil on the wick before I place the wick in the tank. To do this I take my wick and place it against the tank so that I can judge where to start wrapping my coil. I take my kanthal wire and wrap five to six wraps around the wick move up in an even spaced spiral, making sure that the wire is not too tight, but not too loose either. After I wrap my coil around the wick I drop the wick into the wick hole making sure that the wick does not touch the bottom of the tank. This is done just in case the edge of the wick is not oxidized completely and prevents it from shorting. The bottom wire of the coil is wrapped under the negative terminal screw, while the top wire is wrapped under the positive terminal screw.

Since the Z-ATTY-PRO is designed for the ProVari there is no need to use a multimeter to test for shorts. The ProVari has built-in short protection. It’s time for the big moment… time to test the coil! Fire the ProVari and watch the coil start to glow. If it all works out correctly on the first try I will fill the tank and place the top cap on making sure that the air hole lines up with the wick.
I believe the Z-ATTY-PRO is a well-machined beautiful RBA that works great on the ProVari. I would recommend it to anyone looking for a genesis style RBA. Unfortunately I cannot recommend it for travel out and about as you have to be aware of how it is sitting.
Pros:
Well machined RBA
Crystal clear tank
Smooth design flow when coupled with the ProVari
Good vapor production with exceptional flavorCons:
Price, as of this review the price is $140 at provape.com
RBA must be standing up at all times
Hot spots can be an issue with the top connection
Hints and tips:
Genesis RBA’s can be prone to hot spots and hot legs (connection to positive or negative terminal). One way to fix a hot leg at the negative terminal is to push the wire down so that it touches the base of the RBA thus making the wire run shorter from the negative to the wick. To fix a positive hot leg you can slightly curve the wick towards the positive terminal. Hot spots can be a real pain in the rear. A hot spot is a point on the coil that heats up faster than the rest of the coil. This can cause a short coil life and one heck of harsh vape. To correct a hotspot the easiest way to do so is to take a small screwdriver and move the coils until the hot spot is gone. Another cause of a harsh vape is the air hole alignment. To correct the air hole alignment all one needs to do is line the air hole up with the wick.
Warning:
When building a coil either you should use a multimeter or a protected device. Shorting a battery can cause the battery to vent or explode. Keep vaping safe and use common sense.
Steven Kaderabek
Steve Kaderabek is the admin of the Spinfuel Discussion Forum. (SDF) He’s extremely knowledgeable of all things vaping, with a particular penchant for RBA’s. You can converse with Steve in the forum any time you like. Feel free to leave comments and questions about this review below. Oh, and join the forum while you’re at it.


