Table of Contents [show]
The All-Purpose 100W TC Starter Kit
eLeaf iStick Pico MEGA
Our original review of the eLeaf iStick Pico () published on March 24 of this year has been the most read review in all of 2016. More than 12,000 individual readers have come to read about this best-selling device. Today, we bring you the most comprehensive review for the next best-selling iStick, the iStick Pico Mega. And man, MEGA only just begins to explain this supped-up iStick Pico.
Question: What is different about the new eLeaf iStick Pico Mega when compared to the iStick Pico?
Answer: A Lot. I mean, seriously, A LOT! First, the iStick Pico Mega is compatible with an 18650 cell AND a 26650 cell. A Pico with a 26650? Yep. Next, it’s an 100W device now (when installed with the v1.01 firmware update available now), plus the new Smart Mode, easily use a Custom Logo, and a simplified Wattage Mode interface…The Starter Kit comes with a full-blown Melo 3 Atomizer, and oh, did I mention a 100W of power?
iStick Pico Mega at A Glance
Size: 53.5mm*31.5mm*73.5mm
Thread type: 510 thread
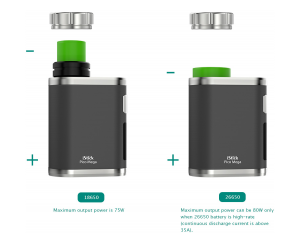
Cell type: High-rate 18650 cell (Continuous discharge current should be above 25A)
Cell type High-rate 26650 cell (Continuous discharge current should be above 35A)
Output mode: Smart/VW/Bypass/TC (Ni, Ti, SS, TCR-M1, M2, M3) Mode
Output wattage: 1-80W (100W with firmware update (Mac and PC)
Resistance range: 0.05-1.5ohm (TC modes)
Resistance range: 0.1-3.5ohm (Smart/VW/Bypass mode)
Temperature range: 100-315℃/200-600℉ (TC modes)
Color: Hot Pink, Black, Grey, Silver, White
Notable Feature Highlights
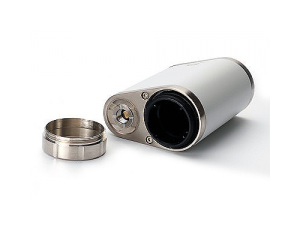
1 – 18650-adapter sleeve – Makes switching from the 18650 to the 26650 as easy as it can be. The sleeve is inserted at the factory to save packaging space, but is easily lifted out.
2 – A larger, easier to read OLED Display – While not the eVic-style display, the larger display in the Pico Mega is more rectangular than in the original Pico, with the icons and numbers larger and a bit brighter.
3 – The Chassis of the iStick Pico Mega is more contoured, with one end wider to accommodate the size of a 26650 cell. It fits inside the palm nicely when the wider end tucks into the palm.
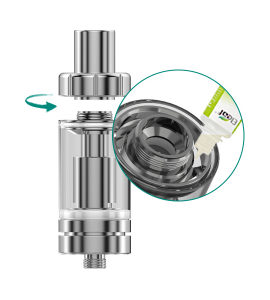
4 – A full size Melo 3 sub-ohm tank. The full size Melo 3 holds 4mL of eliquid, is 22mm in diameter, made with high-grade 304 Stainless Steel, and comes in Black and Silver. The Melo 3 features a large Top-Fill system and hidden airflow system at the bottom of the tank.
5 – Naturally, the iStick Pico Mega, when updated to v1.01 firmware offers the latest and greatest TC system,

with TCR modes for multiple SS coils, including SS316L.
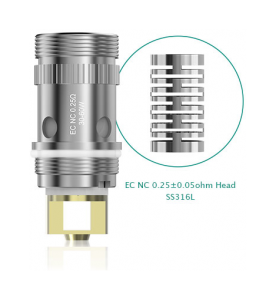
The eLeaf iStick Pico is under $50, comes with 3 coil heads, including the brand new EC NC 0.25ohm Head. Capable of working well under high wattage settings, this newly added stainless steel 316L NotchCoilTM (EC NC 0.25ohm±0.05ohm Head).
Additional coil heads in the Starter Kit version include;
- One EC 0.3-ohm – SS
- One EC 0.5-ohm – SS
Upgrading and Charging the iStick Pico Mega
CLICK FOR LARGER IMAGELike many box mods, especially from eLeaf, the iStick Pico Mega can charge the batteries inside the unit, as well as upgrade the firmware using the included USB cable. However, we recommend using an external Nitecore battery charger to charge batteries faster, and safer.
Upgrading the firmware is as simple as downloading the upgrade app for Mac or PC, launching the upgrade app, and following the simple directions.
Creating a Custom Logo for your Pico Mega – My Way
Launch Photoshop or any other image app capable of saving a file in BMP format. Create your logo using a single color, size the image to 96×16 pixel (I always start off with a size 5 times larger and reduce size in steps. I begin with a 480×80 file, then reduce it to 96×16 and save as a BMP.
Launch the firmware update app, choose LOGO, then direct yourself to your saved file, the new logo. Press the fire
button twice in quickly while the Pico Mega is powered on to enter the logo on/off option and press up or down button once to turn on or off logo.
With your logo “on” new logo will continue to show until the mod goes into sleep mode. It will require a little practice to create the exact high quality custom logo unless you’re practiced in creating BMP images.
Performance and Real World Usage
If, like a few million others, you love your iStick Pico you’ll go nuts over the iStick Pico Mega. While it is a tiny bit larger, especially with the full size Melo 3, it is still a tiny mod. This time around you get the latest TC tech and a 100 watts to put at your disposal. There is virtually no atomizer you can’t use with the iStick Pico Mega.
My review for the original iStick Pico I raved about the Melo 3 Mini. Incredible performance, great flavor and wick vapor. Check out the original Pico review for an idea of what I thought about the Melo 3 Mini.
The Melo 3 has one change, beside capacity of course, and that is a new removable wide-bore drip tip. Other than that, the Melo 3 works extremely well. So far, (4 days) the Melo 3 has not leaked. An upcoming review on the Melo 3 in Black, reviewed about a month ago, will show no serious leaking issues as well.
Basic Functions of the iStick Pico Mega
Stealth Mode (display off always) – Press and hold the Fire Button and the Minus adjustment button for a few seconds to get access to Stealth On/Off.
Locking – Press Plus/Minus buttons at the same time for a few seconds until the display reads “Locked”. Do this again to unlock the Mod.
Display Orientation – Press and Hold Plus/Minus buttons while the Mod is OFF. After a couple of seconds, the display will switch for right/left handers.
VW/TC Mode Switching – Press the Fire button 3 times quickly to begin navigating through the various modes, including the 3 memory slots.
Adjusting the TCR values is a bit more complicated to cover here, just read the manual and follow the directions and you’ll be just fine.
The eLeaf iStick Pico Mega in the Real World

As soon as I realized the iStick Pico Mega could use a 26650 battery I immediately grabbed a fully charged 26650 and removed the 18650 sleeve and inserted the larger battery. It gave the device a bit more weight, but not even close to being uncomfortable. The Battery Life is unbelievable though, I can go most of the day with heavy vaping and still have about 25% power left. Moving the design of the next Pico to be compatible with the 26650 was a great decision.
The Melo 3 is every bit as good the Melo 3 Mini, and the performance is unreal. Lots of great flavor and plenty of
vapor with all the coil heads. The atomizer stays fairly cool to the touch after some serious vaping, much unlike the Ultimo by Joyetech.
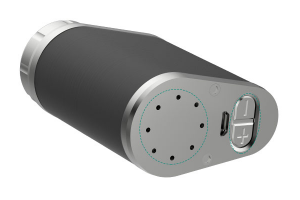
I’m not crazy about the adjustment buttons being on the button of the mod, but I am used to it (the original Pico is the same way). But it does makes sense because eLeaf squeezed so many features onto the smallest possible footprint, so they had to go somewhere.
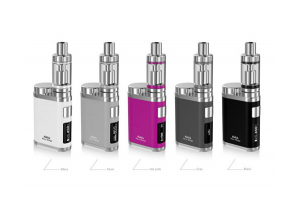
The iStick Pico Mega is #44.95 (Element Vape) for the complete Starter Kit.
The eLeaf iStick Pico Mega, once fantastic upgrade.
Grade: A+
“An excellent starter kit for both new and advanced vapers. This little powerhouse can satisfy the vaping needs of any vaper, with any atomizer, and any eliquid. A stellar achievement as a follow up to the marvelous iStick Pico.”
Julia Hartley-Barnes
Pick one up now at Element Vape!


