 I have to confess to being really excited about the possibility of reviewing the Magneto Brass Mech Mod. I’ve wanted to get my hands on a SMOKTech Magneto ever since the first time I saw one; frankly, the Magneto was what turned me on to mechanical mods in the first place.
And the Evolv Kick was a source of much want from me, similarly, from the first instant I drank in the description of what it’s intended to do.
So you can probably guess that when the Magneto Version 2 and the Kick 2 came along, I was all about getting my mitts on them at long last. Well, today is the day.
I’m going to go over the qualities of each, individually, and then the combination of the two together. I’ll hit on the ups and the very, very minor downs, and you get to come along for the ride. Let’s begin.
Presentation
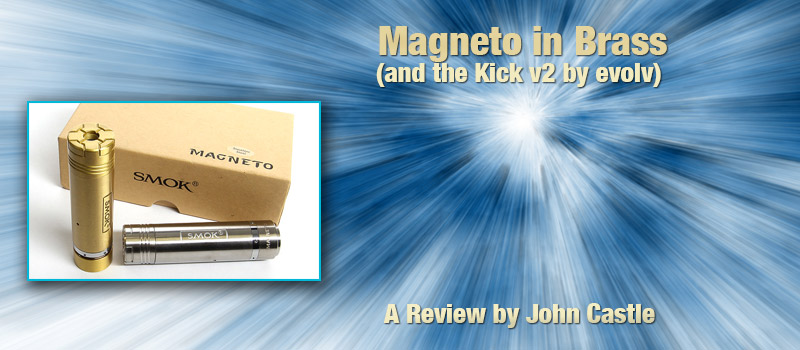
The SMOKTech Magneto V2NL in Brass, which Spinfuel received arrived in a compact brown box with the name of the mod marked in a futuristic-military style stencil typeface. After lifting off the top of the box, I found the contents neatly arranged inside.
On top was a simple but competently written manual printed on the same sturdy paper with a cover of the same plain brown background with black-stenciled title. Under that was the unit itself, sheathed in plastic and resting in fitted black foam.
What this presentation says to me is not skimping nor inattention to detail, but rather a businesslike, no-nonsense approach. To me, as a Vaper, it conveyed the message: We know you want to get right to using this. We’re gonna step right out of your way so you can get to it.
Build Quality of the Magneto Brass Mech Mod
The build quality on the Magneto is like nothing I have experienced before. It’s my third mechanical mod, and where build quality alone is concerned, simply leaves the previous two in the dust.
The first thing you may notice about the Magneto, at least in brass (I can’t speak to this attribute on the stainless steel model) is the weight. Please don’t misunderstand; we’re not talking the unusually stout heft of an iTaste VTR here, but you will never forget that it’s in your hand.
That weight, by the way, lends a feel of unsurpassed solidity when the device is equipped with your choice of battery. Those choices are the standard 18xxx series batteries, by the way, from 18350 to 18650. I confined my testing to 18350 and 18500 so that I could test the device in both Kicked and un-Kicked operation.
In un-Kicked configuration, I was also surprised by just how compact the Magneto is. Un-Kicked and with the diminutive 18350 battery in it, I was easily able to palm the entire Magneto. Kicked and packing the 18500 — I would guess putting it at easily its length while packing an 18650 — the device was at its fully extended length, which is more than a handful even for a fella like me who has big ol’ shovel mitts.
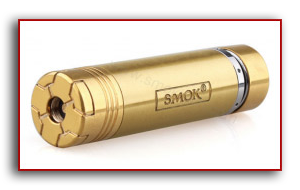 The attention to detail is simply astounding for a mechanical in the Magneto’s very friendly ~$50 price range. From the SMOK branding on its side to the decorative-yet-functional airflow channels in the connection cap to the contrasting silver firing-button-cap collar, there’s something to please the eye from every angle.
I will note, however, that I noticed the absence of one feature on the brass model that I was expecting based on descriptions of the stainless-steel model: there is no “Spider” graphic on the firing button, nor did I see the legend “1939” anywhere on the device I have in hand.
The only minor complaints I could even dream up to offer regarding the build quality of the Magneto is that the threading does have a squeakiness to it and that pairing the 18500 with the Kick 2 requires a minor bout of wrestling to get the connection head screwed onto the battery tube.
The Magneto Brass Mech In Action
Un-Kicked performance of the Magneto is at least on par with my previous mechanical, the Kamry K101, and light-years beyond my very first mechanical, the SMOKTech E-Pipe.
Now, I’d love to be able to spew numbers at you; fact is, I can’t. What I can tell you is that under normal usage, the Magneto is an absolute pleasure to use. The travel of the firing button is short and sure, the locking ring for the firing button operates as… well, here we run into an interesting note.
For anyone who has used a Kamry K101, the locking ring is already intuitive. For anyone who hasn’t, it may not be. Most people are used to rotating a screw, or any other threaded apparatus, according to the charming colloquialism, “Lefty loosey, righty tighty.”
Well, that’s not how the locking rings for the firing buttons of the K101 or the Magneto operate. In order to lock the firing button it is necessary to rotate the locking ring to the right, which causes it to thread downward into position to hold the firing button in the “Off” position. Unlocking it requires rotating the locking ring to the left.
Another point of interest is found in the installation of the battery. While some mechanicals are opened for battery insertion by unscrewing the bottom cap which houses the firing button, the Magneto is opened by unscrewing and removing the top cap which houses the connection threads.
When it comes to AD compatibility, everything with 510 threads will work “out of the box.” For eGo-based ADs, however, as well as 510-threaded devices that have a “collar”, as in the case of the Kanger Mini Protank, Protank II and onward, a 510-to-eGo adapter is a must; the reason is that the 510 connection on the Magneto is purely 510 — no well surrounding the threads, even, just the threads.
Alternatively, there are a couple of “aftermarket” connection caps for the Magneto; however, these may or may not be to your taste. Here’s why. The Magneto 2 has a floating center pin; while the aftermarket caps’ center pins are adjustable, they require manual adjustment rather than floating. My personal preference, then, is to use a simple adapter.
The Magneto Brass Mech Mod – Overall
My overall impression of the SMOKTech Magneto V2NL is that it is a gorgeous device, solid as a brick, is amazingly easy to hold and to use, performs like a champ, and is delivers all those qualities at a very attractive price point.
Evolv Kick 2
Presentation
And now we come to the Evolv Kick 2. As someone who missed out on the first incarnation of this device, I’d like to think that gives me fresh eyes with which to evaluate this little beastie. No preconceptions here, no, “But it used to do this!” or “They still haven’t added that?”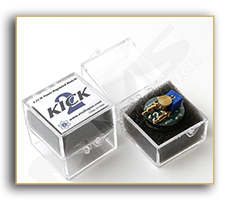
So when it arrived, I eagerly searched the box for it… took me a hot minute to find it in there. Here’s why:
The packaging of the Evolv Kick 2 is incredibly minimal. Just an acrylic box that’s not much bigger than the module itself, actually, with the actual processor resting in a thin bed of black foam and a paper insert on the inside of the top lid. If you get the Kick 2 with anything else, you want to search the box real good, or you might spend a few minutes convinced it isn’t in there.
Additionally, there’s one thing the box doesn’t include: Any kind of manual. I have to dock points from Evolv for this — or I would, if I were in the business of giving points to people. Anyway, this makes installation of the module something of a puzzle, as I’ll get to in a bit, and it really shouldn’t be one.
Tuning
Now we come — I say “now”, as if we’ve covered so much already — to one of the points of the evaluation of the Kick 2 where I run into a little bit of disillusionment..
Now, I wasn’t completely in the dark on what to expect here, having looked at images of the Kick 2; I knew that in order to adjust the wattage of the module, I’d need a jeweler’s screwdriver, for example.
What I didn’t know is that I’d need a big ol’ honkin’ magnifying glass, because the markings on the adjustment screw and on the detents engraved on the control pot are tiny. You really need hawk-like vision to adjust this device’s wattage output without the aid of extreme magnification.
The other thing you’re going to run into here is that because of the analog nature of the control scheme you’re working with, you should absolutely not expect pinpoint accuracy with your wattage adjustment. Frankly speaking, the best you should ever hope for is ballparking it.
You can adjust the device along a range that runs from 5 watts to 15 watts — but anywhere in between should be described with the suffix “-ish.” As in:
“Hey, man, what wattage are you vaping at?”
“9-ish.” Or, “12-ish.”
–Because the fact is that you just can’t truthfully give a more accurate answer than that with the Kick 2.
Installation
Installing the Kick 2 into a mod like the SMOKTech Magneto is easy as pie, but there are a couple things a first-time user needs to know first that aren’t made clear in that invisible user manual.
The device has two horizontal contact pins. What the first time user needs to know about these pins is one simple thing: They’re springy. (I don’t know if they’re actually on springs, since I haven’t done a teardown of the Kick 2 and don’t intend to.)
The first time I tried to install my Kick 2 into my Magneto, I couldn’t get the module to drop in, because the horizontal contact pins wouldn’t allow the device to fit into the mouth of the battery tube.
I actually spent a couple hours despairing that I wasn’t going to get to use the device and wouldn’t be able to review it because I couldn’t get it to fit into anything. Aaaaand then I got to feel like a dope when I finally found a YouTube clip that showed somebody installing it into a mod. Oh. The pins are springy.
One other note regarding the installation of the Kick 2, particularly in the Magneto with an 18500 battery. The Kick 2 adds a whole battery size worth of difference in the overall length of the mod.
So if you use an 18350 plus Kick 2? You’re dealing with the mod at roughly 18500 length. So 18500 plus Kick 2 comes out to about 18650 length for the mod — and in that configuration, you’re going to end up doing a little piece of wrestling with the mod to get all the threads engaged so you can tighten her up.
Magneto Brass Mech – Conclusion
My overall impression of the Kick 2 is that it’s an amazing little device that has its quirks — and its quirks may mean that it isn’t for everybody, and certainly isn’t ideal for every situation.
I hate to say that, I really do, because there are some Vapers for whom the Kick 2 is going to be the best thing since sliced bread, all the time. But for me… not so much. Here are the reasons why:
Lack of accuracy in adjustments.
Adjustment requires a hand tool.
Adjustment not “on the fly.”
Adds more size to the mod than I’d like.
Now do keep in mind that these shortcomings aren’t specifically or exclusively faults of the Kick 2; rather, they’re simply limitations of this type of device. Perhaps one day, drop-in modules will be thinner and use a more precise, user-friendly method for adjusting their output.
But since I’ve thrown out the “bad”, let me balance it with the good:
Adds an extra layer of safety to mechanical mods.
Adds wattage adjustment.
Now, the good list is shorter — but those two ‘good’ points are so powerful that they really do balance out the ‘bad.’ And, really, the whole list, taken all together, adds up to one thing: The Evolv Kick 2 is absolutely the best way to make your mechanical equal in almost every respect to microprocessor-controlled mods like the eVic, the VAMO or the ZMAX. Every respect except for this one: Adjustment and display of power output.
Conclusion: The Big Questions
Let’s wrap this up with the questions that matter most to users:
1. Are they good?
The SMOKTech Magneto 2, in my opinion as of this writing, is the best mod you can get in its price range.
The Evolv Kick 2, likewise, is the best DIM (Drop-In Module) you can get for your mechanical.
2. Are they for me?
Truth to say, only you can know that. But let me tell you who I think these two devices are for; you’ll know if it’s you. The SMOKTech Magneto is for anybody who wants a compact, solidly built, comfortable, simple and beautiful mechanical at a price point that your bank account will smile on.
The Kick 2 is for the more experienced Vaper who already knows the benefits of variable wattage and wants those benefits enough to accept a little bit of fuzziness in wattage selection and the additional pocket real estate you’ll pay to have it in your mechanical.
3. So I’m new to vaping — what’s the deal with mechanicals? Should I get one, or should I wait?
Let me tell ya, I wish I’d started off vaping with something like the Magneto. Why? Because when you get right down to brass tacks, the Magneto is just as basic as something like the eGo or the Halo Triton — but it’s sturdier.
It’s more compact, length-wise, when packed with a battery of roughly equivalent capacity — and here’s where it would’ve been whiz-bang cool to the newbie that I used to be — you can use bigger, badass-er batteries while keeping everything else the same.
On the other hand, there’s extra expense involved. You can start off with a Halo Triton, for example, and that comes with the whole kit, for right around $70 when you factor in shipping and handling — batteries, charger, clearomizers. The Magneto? $50. But that’s just the device itself.
If you’re starting out from scratch, you’ll also need batteries. I recommend a pair of 18350s and a pair of 18500s. Then you need a charger for those four batteries. I recommend the Nitecore Intellicharger i4. And then you need clearomizers — I recommend the Aspire BDC Vivi Nova.
Overall, that’s a whole lot more money to invest in something that, if you’re just starting out, you may or may not even be sure is going to work for you yet. But I’d like to think that if you’re ready to make that investment in hardware, you couldn’t find better hardware to make that investment in than the SMOKTech Magneto.
It’s so simple and comfortable to maintain and use that if there’s any one mechanical that’s the right choice for a Vaper’s first mech, this is the one.
More In Spinfuel:
Electronic Cigarettes Receives Surprise Boost From China
MECH MOD SAFETY WITH THE VANTRA
Noisy Cricket Mech Mod & Indestructible RDA Review
Wulf Mods Hell Hound Mech Mod (Authentic)
The Rincoe Mechman Mod Starter Kit Review